How to Identify Anatomical Areas of the Body in 2026?

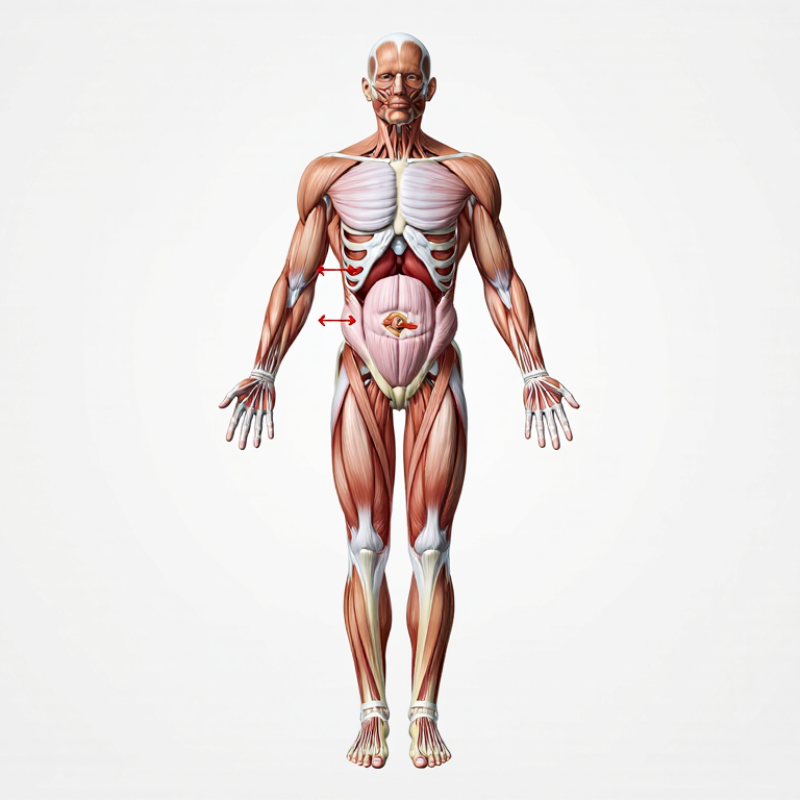
Knowing the body’s anatomical areas can make diagrams, health explanations, and clinical directions easier to follow. Anatomy uses shared terms to describe locations, structures, and relationships, so clear language matters. This guide introduces major regions, from the head and neck to the trunk and limbs, without assuming prior medical training. Picture a simple front-view diagram: the chest sits above the abdomen, while the pelvis connects the trunk to the legs. The sternum, navel, and kneecap offer familiar landmarks for finding nearby areas. Names are maps.

In 2026, digital models and interactive diagrams can help readers explore the body from different angles. This guide explains how to use those tools alongside standard anatomical terminology, including directional words such as anterior, posterior, and lateral. It also encourages careful attention to viewpoint: a left-side label on a diagram may refer to the body’s left, not the viewer’s. A useful habit is to compare labels with visible landmarks and check unfamiliar terms against reputable anatomy references. Still, diagrams simplify real bodies. Individual proportions vary, and a picture cannot explain every difference. Some labels may feel confusing at first; that is worth noticing, not hiding. Use anatomical language to understand general locations, not to diagnose symptoms or replace advice from a qualified health professional.
How to Identify Anatomical Areas of the Body in 2026?

Establish the Standard Anatomical Position and Body Orientation

How to Identify Anatomical Areas of the Body in 2026?

Establish the Standard Anatomical Position and Body Orientation

Anatomical position provides a consistent reference for describing body areas. Picture a person standing upright, facing forward, with the head level and feet pointing ahead. The arms rest at the sides, with palms facing forward and thumbs pointing away from the body. Small details matter. Use this reference even when someone is sitting or lying down; the anatomical labels remain the same. Right and left refer to the person’s sides, not the observer’s. This can feel unintuitive at first.

Tips: Before describing a location, check the person’s right and left. For example, the person’s right arm is on your left when they face you. Say the terms aloud and point to the area, if appropriate.

Orientation words make descriptions more precise. Anterior means toward the front; posterior means toward the back. Medial indicates closer to the body’s midline, while lateral means farther from it. Proximal describes a point nearer a limb’s attachment; distal means farther away. For example, the elbow is proximal to the wrist. Even careful learners can reverse a direction, so pause and check the reference position before documenting or explaining an area. Anatomical terms support clear communication, but they do not replace a qualified clinical assessment.


Divide the Body into Major Regions and Subregions

To identify anatomical areas, divide the body into broad regions, then name their smaller parts. The axial region includes the head, neck, and trunk. The appendicular region covers the upper and lower limbs. Keep the map simple.

On the trunk, distinguish the thorax, abdomen, pelvis, and back. Use visible landmarks to make descriptions clearer: the sternum sits at the chest’s center, the umbilicus marks the abdomen, and the inguinal crease lies where the thigh meets the trunk. The limbs also benefit from subdivision. Name the upper arm, forearm, and hand; then the thigh, leg, and foot. In anatomical usage, “leg” means the segment between knee and ankle, not the whole lower limb. That distinction is easy to miss.

Regional terms matter in clinical communication and body measurements. The World Health Organization’s 2022 European Regional Obesity Report states that 59% of adults in the region were overweight or living with obesity. This is not an anatomy classification, but it underscores why precise abdominal and limb descriptions can matter in health assessment. A region map is useful, though real bodies do not always fit tidy boxes. Swelling, injury, or individual variation can blur boundaries. Describe the landmark and side when a regional label feels uncertain.

How to Identify Anatomical Areas of the Body in 2026? – Divide the Body into Major Regions and Subregions

Major Region Subregions Useful Surface Landmarks How to Locate the Region
Head Cranial, facial, orbital, nasal, oral, auricular, and occipital regions Skull, forehead, eyes, nose, mouth, ears, and back of the head The cranial region surrounds the braincase; the facial region includes the structures of the face.
Neck Anterior, lateral, and posterior cervical regions Chin, clavicles, sternum, cervical spine, and prominent neck muscles Connects the head to the trunk, extending approximately from the base of the skull to the upper chest and shoulders.
Thorax Chest, sternal, pectoral, mammary, and vertebral regions Sternum, ribs, clavicles, nipples, and thoracic spine The chest portion of the trunk lies between the neck and abdomen and is enclosed largely by the rib cage.
Abdomen Epigastric, umbilical, hypogastric, right and left hypochondriac, lumbar, and iliac regions Rib margins, navel, iliac crests, and abdominal midline Located between the thorax and pelvis. Clinically, it may also be divided into four quadrants: right upper, left upper, right lower, and left lower.
Back Scapular, vertebral, lumbar, sacral, and gluteal regions Shoulder blades, spine, waistline, sacrum, and buttocks The posterior trunk extends from the neck to the pelvis; the lumbar region is the lower back.
Pelvis and Perineum Pelvic, inguinal, pubic, perineal, and gluteal regions Hip bones, pubic symphysis, groin creases, and sitting bones The pelvic region lies between the abdomen and thighs. The perineum is the area between the thighs, including the external genital and anal regions.
Shoulder and Axilla Deltoid, acromial, and axillary regions Acromion, shoulder contour, and armpit The shoulder joins the upper limb to the trunk; the axilla is the hollow beneath the shoulder joint.
Arm Anterior and posterior brachial regions Shoulder joint, upper-arm shaft, and elbow In anatomical terminology, the arm is the portion of the upper limb between the shoulder and elbow.
Forearm and Elbow Anterior and posterior antebrachial regions; cubital region Elbow crease, olecranon, radius, and ulna The forearm extends from the elbow to the wrist. The cubital region refers to the area around the elbow.
Hand Carpal, palmar, dorsal, metacarpal, and digital regions Wrist crease, palm, back of hand, and fingers The hand begins at the wrist; the thumb is the first digit, and the fingers are digits two through five.
Thigh and Knee Anterior and posterior femoral regions; patellar and popliteal regions Hip joint, kneecap, and hollow behind the knee The thigh extends from the hip to the knee. The patellar region is in front of the knee; the popliteal region is behind it.
Leg Anterior, lateral, and posterior crural regions Tibial crest, fibula, and calf The leg, in anatomical terminology, extends from the knee to the ankle; it is distinct from the thigh.
Foot and Ankle Tarsal, calcaneal, metatarsal, plantar, dorsal, and digital regions Ankle bones, heel, sole, top of foot, and toes The foot begins at the ankle. The plantar surface is the sole, while the dorsal surface is the top of the foot.

Orientation note: Anatomical directional terms assume the body is standing upright, facing forward, with arms at the sides and palms facing forward. Right and left refer to the person being described.

Use Anatomical Planes and Directional Terms to Describe Location

How to Identify Anatomical Areas of the Body in 2026?

Use Anatomical Planes and Directional Terms to Describe Location

Clear anatomical descriptions begin with a shared reference point: the anatomical position. The person stands upright, faces forward, keeps arms at the sides, and turns palms forward. This convention helps readers interpret left and right consistently. The sagittal plane divides the body into left and right portions; the frontal plane separates front from back. The transverse plane divides upper and lower portions. These are imaginary guides, not visible lines.

Directional terms make a location more precise. The sternum is anterior to the heart, while the spine is posterior to it. The elbow is proximal to the wrist because it sits closer to the trunk; the fingers are distal to the wrist. Medial means nearer the body’s midline, and lateral means farther from it. For example, the nose is medial to the eyes. Pairing a body region with a plane and direction can reduce ambiguity. Still, learners sometimes reverse left and right when viewing another person. Pause and picture the anatomical position before documenting a finding.

Tips: Describe the patient’s right or left, not your own. Name the landmark, then add the direction: “two centimeters lateral to the navel.” Keep the wording specific, and check it against the body position. I still find a quick mental sketch useful.

Identify Surface Landmarks and Palpable Structures

How to Identify Anatomical Areas of the Body in 2026?

Identify Surface Landmarks and Palpable Structures

Surface landmarks turn an unseen anatomical map into something you can examine. Start with bone. Feel the clavicle from its inner end toward the shoulder, then locate the acromion at the shoulder’s outer edge. On the trunk, trace the sternum and compare both iliac crests. Use light, deliberate pressure; pressing harder does not make a landmark more certain.

A useful routine is to position the person comfortably, explain each touch, and compare left with right. Note posture and nearby structures before naming a point. The patella is easy to see, but the joint line sits beside it and can be less obvious. Soft tissue, swelling, and body shape can blur boundaries. Even careful mapping can be imperfect; record uncertainty rather than forcing a match.

Landmark accuracy matters in practice. The American Heart Association’s 2020 adult CPR guidance places hands on the lower half of the sternum and recommends compression depths of 5–6 cm. That measurement is a practical example of surface anatomy guiding action, not a shortcut for clinical training. If a structure is painful, unusually prominent, or difficult to locate, stop and seek qualified guidance. Palpation is a skill. It improves with supervised practice and respectful communication.

Apply a Consistent Method to Locate and Name Anatomical Areas

How to Identify Anatomical Areas of the Body in 2026?

Apply a Consistent Method to Locate and Name Anatomical Areas

Use a repeatable sequence: orient the person, identify a landmark, then name the region. For example, locate the navel before describing the surrounding area as umbilical. Confirm left and right from the person’s perspective, not the observer’s.

Small habit. Keep the body in anatomical position when using directional terms: standing upright, facing forward, arms at the sides, palms forward. This makes “medial” and “lateral” more reliable than pointing alone.

Choose terms from a recognized anatomical vocabulary rather than relying on casual labels. The Federative International Programme for Anatomical Terminology’s Terminologia Anatomica provides an international reference for naming structures.

WHO’s 2024 Global Patient Safety Report estimates that about one in ten patients experiences harm in health care; this does not prove naming errors cause harm, but it underscores why clear clinical communication matters.

In practice, record both the region and a nearby landmark, such as “left forearm, near the wrist.” Check the wording against a reputable anatomy reference.

I still find that familiar everyday terms can feel clearer than formal ones. That hesitation is useful: it reminds us to verify, not guess.

chevron-down